2.06 Manage Leave Screen
FInd it: Dashboard >> Manage Leave
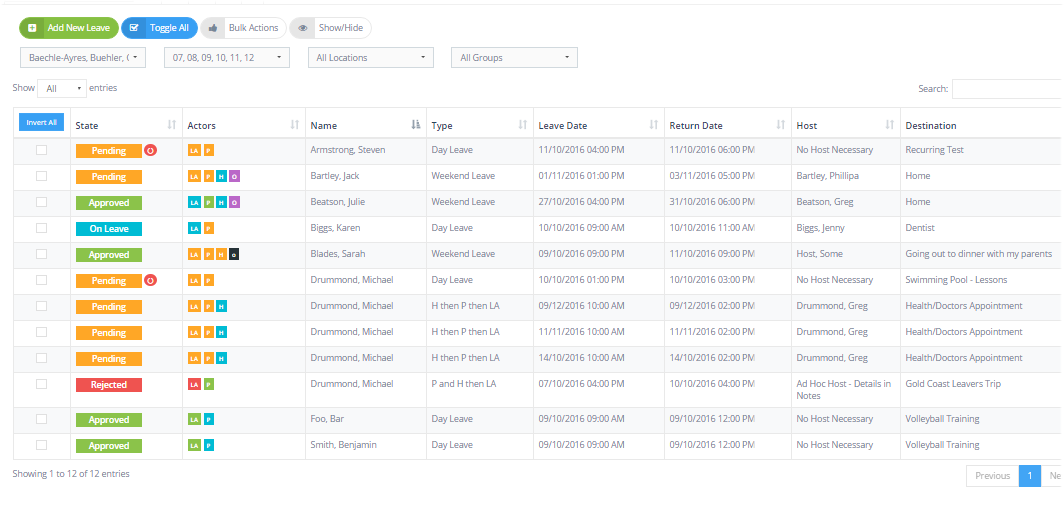
The Manage Leave screen is one of the main management screens in REACH. It is the control centre for managing your leave events that are generated by staff, parents and students. All current leave events will appear on this screen where you can open the Leave details for viewing, approving or editing.
Add New LeaveYou can Add a New Leave Request at any time when working in the Manage Leave screen by clicking on the Add New Leave button. This will open the Create new Leave Request screen for editing and submission. | |
Toggle AllYou can select all of the leave items at once to enable you to undertake a bulk action by using the Toggle All button. (De-Select all works by clicking the Toggle all button a second time) | |
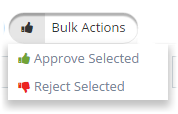
Bulk Actions When multiple items in the Manage Leave screen are selected you can undertake a Bulk approval or a Bulk Rejection of the leave events. | |
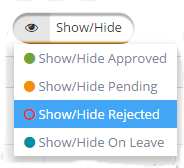
Show - Hide Status Filter The Show-Hide Status Filter allows you to filter your Manage Leave view to display or hide leave events by status. | |
Filtering OptionsYou can filter your view of the Manage Leave Screen by using any of the filtering options, or any combination of the filtering options. Filtering options include by Dorm/House, Grade/Year, or Student Group. | |
Header TitlesYou can rank your view of the Manage Leave Screen by any column or by any combination of columns. To rank by multiple columns simply hold the Shift Key as you select additional columns as your second, third or fourth ranking choice. Example. To rank by Leave Type and then Departure Date first rank by Leave Type. Then hold your shift key as you select the Departure date as the next data filter. | |
Search BarWhen looking at large lists of student leave events it is often easier to search for an individual leave event, leave type or student name using the Search Bar. | |
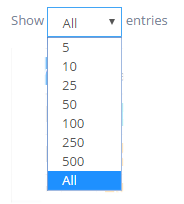
Set your page countYou can set your manage Leave view to paginate by your selected quantity or to show all items in a single page scroll. | |
Multi-item SelectorYou can select multiple items to process in bulk at any time by using the Multi-Item selector in the left hand column or by selecting the toggle all function. | |
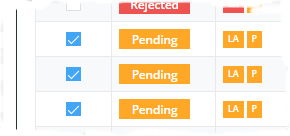
Leave Status IndicatorThere are four (4) states that any leave request can be in. PENDING is the status when the leave is in the process of being approved. The leave event remains pending until the final level approved ha approved the event. APPROVED is the status when the event has been approved by staff by any means. Staff can approve as themself if they are a part of the leave permissions process, by Proxy for another staff member or by Override when editing the status of the leave request in the Edit Leave Details screen. REJECTED is the status when the leave request has been rejected by a staff member or otehr person in the leave approvals process. ON LEAVE is the status when the leave event is currently active with the student signed out to the leave event. A leave event will remain on the Manage Leave screen until it is completed (ie: student returned to campus) or when the return time has expired . | |
Recurring Leave Indicator The Recurring Leave Icon will be displayed when a leave event is part of a Recurring Leave set. | |
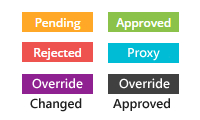
Permissions Status IconsThe Actor Permissions Status Icons provide you with an overview of actions taken in the approvals process for each individual leave event. It displays the status of each Actor in the permissions workflow for each leave event. Each permission level is represented as an icon in the Actors Column (eg: P = Parent, LA = Leave approver). For each actor there are four (4) possible colours that the Icon may appear. PENDING is the status where the approvals procedure is incomplete for the actor or actors at this leavel. APPROVED is the status when the event has been approved by one or more of the Actors in the permission request. That is the person requested to approve the leave event has approved it in their role. PROXY is the status when the event has been approved by a staff member on behalf of an actor in the permissions workflow (eg: an administrator who is not a nominated leave approver has approved on behalf of an absent staff member or on behalf of a parent). When a Proxy approval is made REACH asks the proxy approver for a note to include in the leave permissions audit trail. .REJECTED is the status when the leave event has been rejected by an actor in the leave permissions workflow. OVERRIDE Changed is an additional icon that is added to the actors column when a staff member who is not one of the designated leave approvers has made a change to the leave event in the Edit Leave Details screen. OVERRIDE Approved is an additional icon that is aded to the actors column when a staff member who is not one of the designated leave approvers has approved the leave event. |
If a leave event is in the APPROVED status then it will have one of the following;
1. A Green Approved status for the Highest level Actor - indicating that the highest leavel leave approver has approved the leave.
2. An Aqua Approved status for the highest level Actor - indicating that a staff member has proxy approved the leave on behalf of the leave approver.
3. A Black Override icon - indicating that a person who was not one of the designated leave approvers has approved the leave event from the Edit Leave Details screen.
