11.01 Branding & Assets
Getting there: System Configuration >> Assets & Branding
The Branding & Assets settings are where you set the visual branding of your REACH portal. In this section you can configure the settings for the Emblems that you use in your portal and the images that are used for your login pages on the web and mobile app screens.
Use the File Manager to load your image files
You need to upload your images to your REACH portal using the File Manager feature in REACH. These image files can then be assigned to each part of your REACH portal using the configuration settings available to you in this Branding & Assets section.
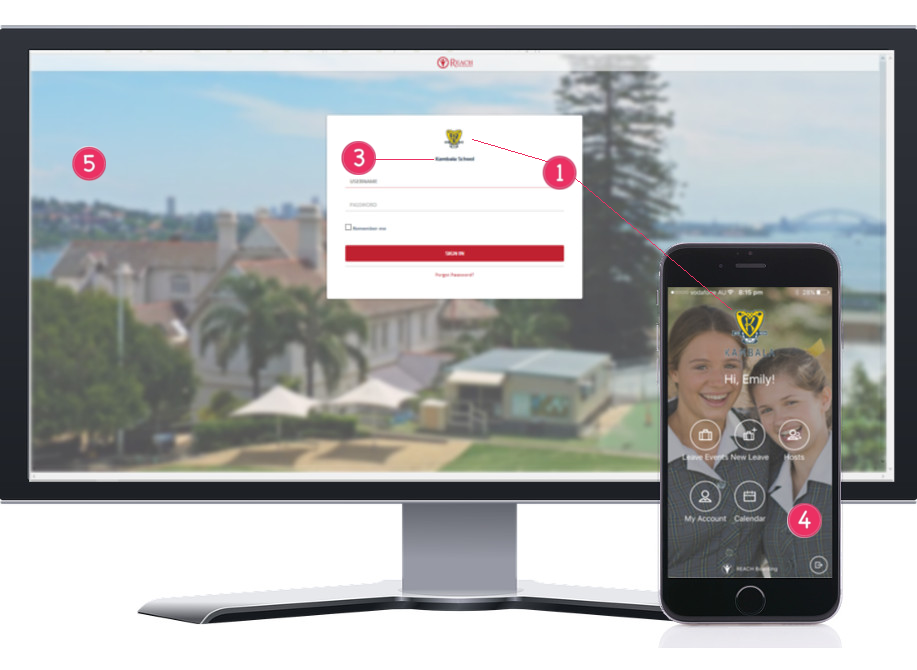
1. School Emblem
The School Emblem is the image that will appear on your Web Portal login screen and your Student & Parent mobile app. You will have a school emblem added to REACH as part of your initial setup service however you can change this at any time by uploading an alternative image using the File Manager feature in REACH and selecting that file to be displayed in this setting.
2. School Emblem Badge
This emblem will be displayed is space restricted places such as you portal menu bar.
3. Show School Name on login
You have the option to display or hide the school name on your web portal login page. If the School Emblem used has your school name as test in the emblem then you may want to hide this school name field. When you select yes to show the schol name on the login page, REACH will get the school name for the school name that is set in your General Settings.
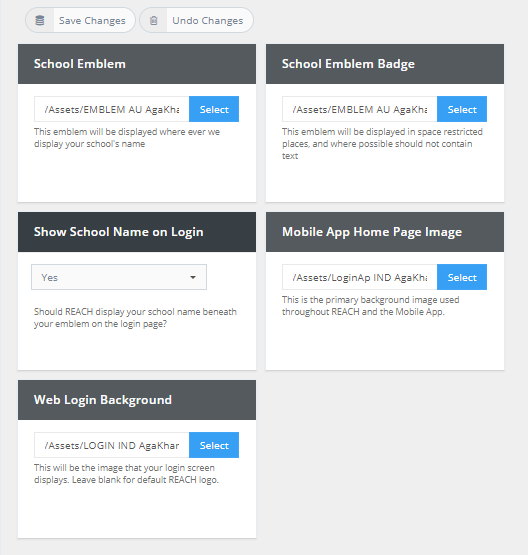
4. Mobile App Home Page image
This is the image that will be displayed as the login page for your Student & Parent mobile app. The ideal size for this image when loading it into your File Manager is 275px wide x 500px high.
5. Web Login Background
This is the image that will be displayed on your web portal login screen. If you leave this setting blank then a default REACH emblem will be used as the login page image.