10.1.1.1 Restrictions - Gating & Grounding
Gating & Grounding restrictions
Gating & Grounding procedures have been upgraded to provide more flexibility on how students can be Gated or Grounded in REACH. The Restrictions Modal is used to implement your Gating or Grounding rules. This modal allows you to select between a number of restriction options which can be applied in combination or individually.
Using the Restrictions Modal to apply Gating & Grounding rules allows you to prevent students from completing the following transactions in REACH:
Submitting Leave
Prevent students from submitting leave request forms. Note that parents and staff can still submit leave requests on behalf of the student when this prevention is in place.
SISO to Off campus
Prevent students from signing out to any off campus locations from the kiosk screen or their mobile device.
SISO to On Campus
Prevent students from signing out to any on campus locations from the Kiosk screen or their mobile device..
SISO to Leave events
Prevent sign out to any Approved Events.
...
Sign up to Events
Prevent student from registering to participate in recreation events generated through the REACH Events manager.
Staff and Parents can override restrictions
Restrictions apply to student accounts and student kiosk screens. Staff can override these restrictions through their staff account and, in the case of submitting leave requests, parents are still able to submit leave.
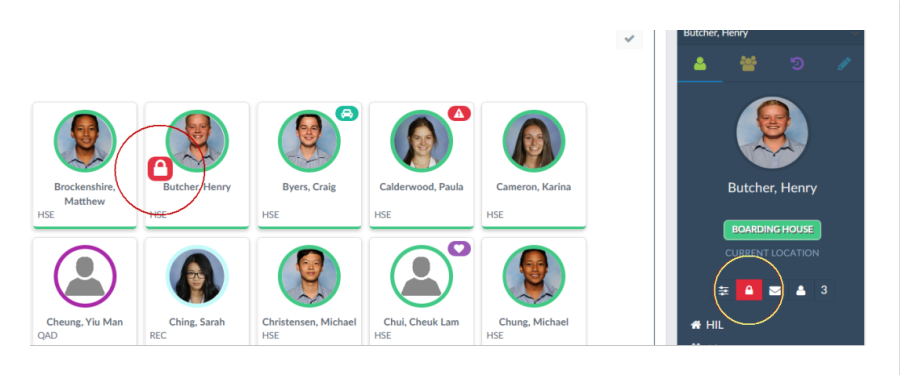
Gated Symbol displayed
When a student is Gated or Grounded symbols will appear to identify this for staff.
- The Restrictions icon on the student's sidebar profile will turn red
- A restrictions icon will appear on the student's image in the Kiosk screen
How to access the Restrictions Modal
Applying Gating or Grounding restrictions is done using the Restrictions modal which can be activated from two places;
- By clicking the restrictions symbol on the student sidebar, or
- By clicking on the Gating field in the student's profile (Security tab)
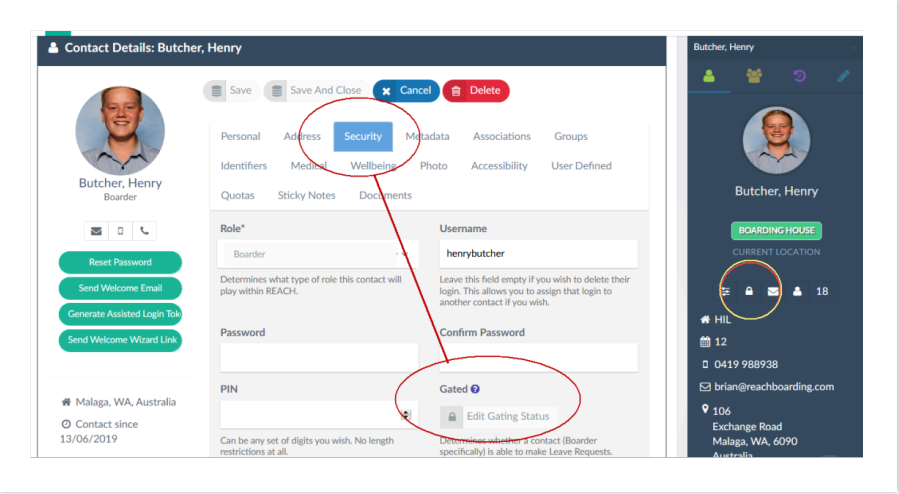
Determine which staff can access the Restrictions Modal
You can control which staff members are permitted to apply restrictions to students in the Accessibility settings of your user profiles.
The permission can be applied to an entire role type (eg: House Supervisors) by setting the Base Security Permission for the Role it can be managed on an individual user's profile through their personal Accessibility settings.
The specific setting is in the People Management Permission Settings
- Can the user activate Boarder Restrictions (EDIT_RESTRICTIONS)
How to use the Restrictions Modal to Gate or Ground students
Gating or Grounding students is done on the Restrictions Modal which allows you to apply multiple restrictions in combination or individually depending on the protocols that you implement in your operations.
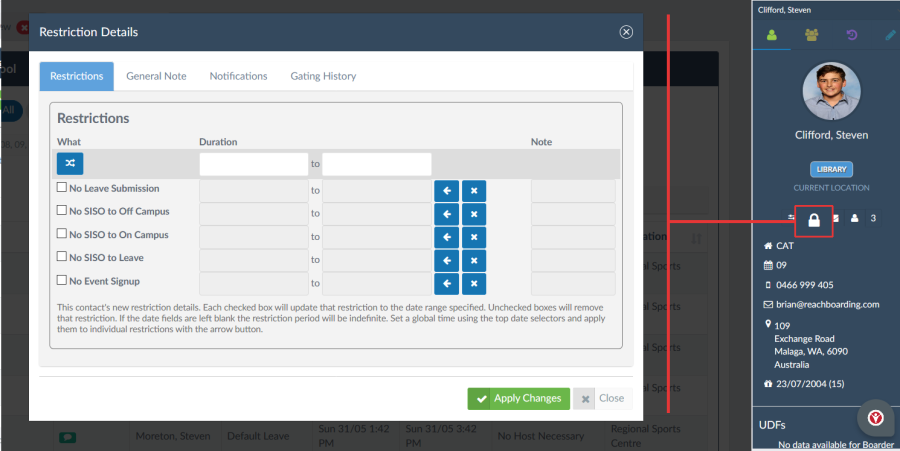
There are 4 sections to the Restrictions Modal
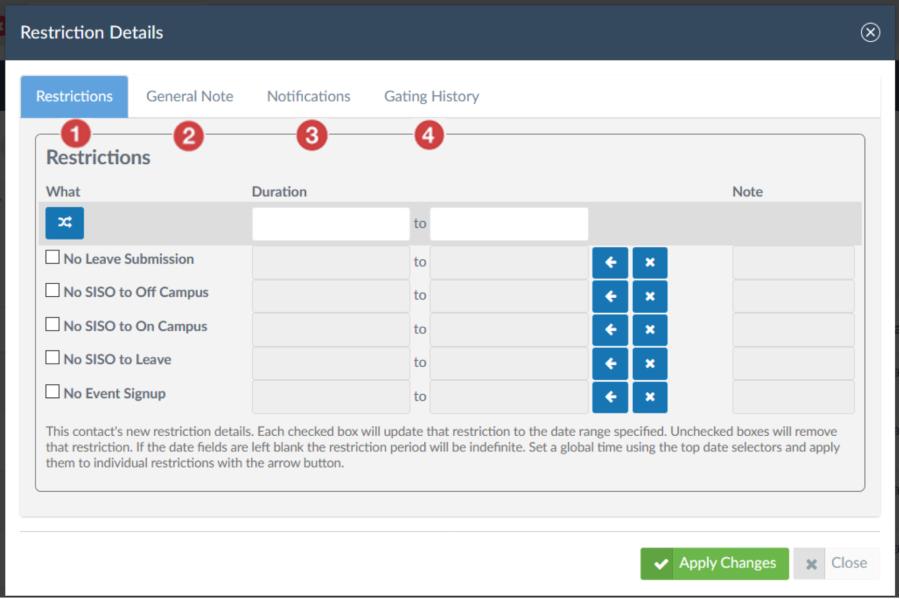
- Restrictions - Applying your dates and restriction types
- General Notes – The note that is saved as part of the pastoral record on the student's profile. This note is also the note that will be shared with students, parents and staff.
- Notifications – Who you send the General Notes message to
- Gating History – A view of the restrictions history for the student
Restrictions Tab - Applying your restrictions
The Restrictions Tab provides the range of restrictions that you have available to implement. It will also display and current restrictions that may already be in place.
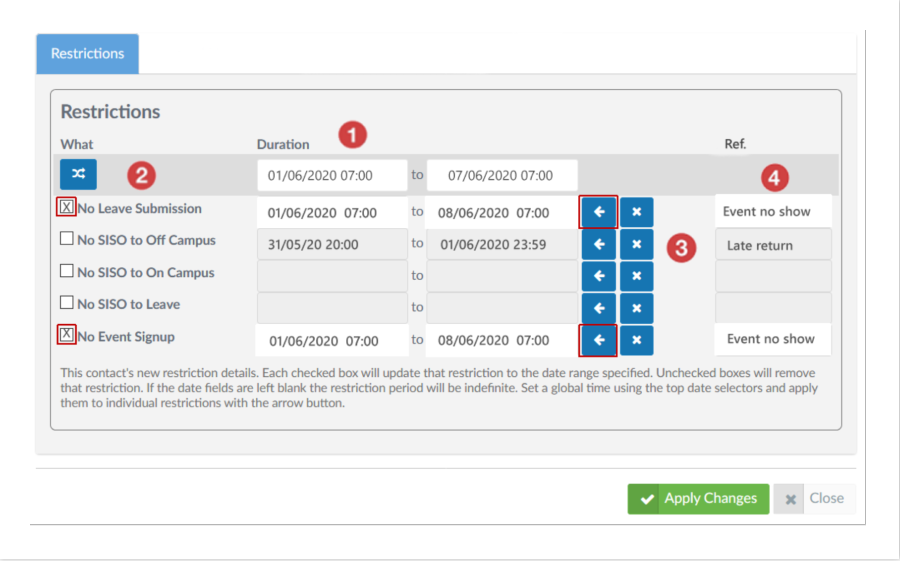
| Set the Date Range for the restriction that you want to apply.
|
| Select which restrictions you want to apply the Date/Time Range to using the selection boxes. Selected item fields will turn white when selected.
|
| Apply the Date/Time range set by clicking on the Row Arrow for the restrictions that you want to apply. |
|
|
You will APPLY the restriction from this screen also once your Note and Notifictions settings have been set.
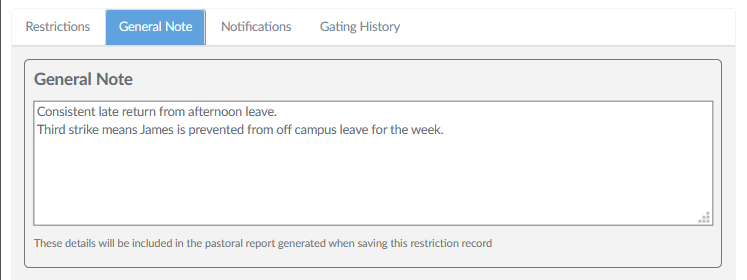
General Note Tab – Prepare the note for the record
The General Note tab is the note that will be recorded with the Pastoral record for the restriction being applied.
It is also the note that will be shared with the student by default and with parents or staff by selection.
Details of the restriction date and timeframe will also form part of this note that is recorded and published to the designated recipients.
Notifications Tab – Set who will be notified
Students will be notified of any restrictions being applied by default however you also have the option to include notification to the Parents of the student and any staff members that you would like to directly inform about the restriction being placed.
The note that will be shared with these recipients in the contents of the General Note tab.

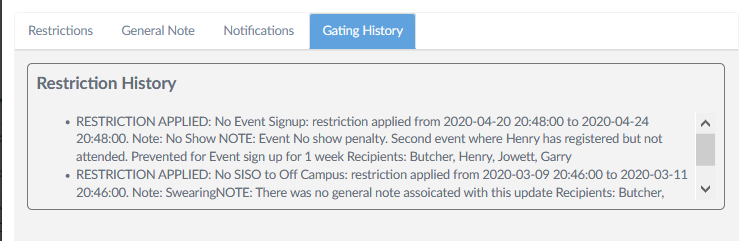
History Tab – View the restrictions history of a student
The History tab will display the restrictions history of a student for quick review. This can often be useful when applying new restrictions to view and understand why previous restrictions have been applied, or why previous restrictions may have been applied.
You can also view a student's restriction history by searching for restriction category pastoral notes in their profile or by producing a Pastoral Records Report in your Reporting > Instant reports menu.
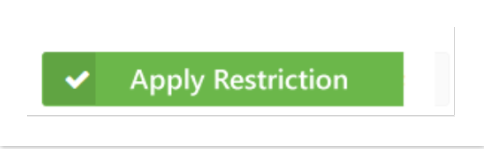
When you have completed entering all of the relevant data for your restriction you can apply the restriction by selecting the Apply Restriction button on the Restrictions Tab.