37.2 Setting the Status of a Student
Overview
The status of a student determines where within Reach that student is visible dependant upon whether the student is ‘Active’ or ‘Inactive’.
The status of a student can be changed by three ways:
A member of staff can change the status using ‘State Management’
The student signs out to a location that is set to deactivate them.
A timetabled event (Rota) of which a student is assigned to either starts (Activates) or finishes (Deactivates).
Active Students
When a student is active they will appear and function as a normal boarder within Reach.
Inactive Students
When a student is inactive they will not appear within the Roll Call and the Sign-in / Sign-out elements of the platform. However, an inactive studentwill still be accessible within the Reach platform so that content can still be created for inactive students. For example a Pastoral report can be raised, the student sidebar accessed, inactive students will appear in reports that are produced, etc.
State Management
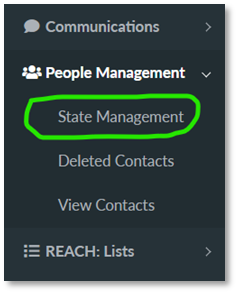
There is a new Main Menu item called ‘State Management’ and it is found:
Main Menu > People Management > State Management
State Management is used for manual control by a member of staff that needs to either ‘Activate’ or ‘Deactivate’ a student status.
When you click on ‘State Management’ and you will be taken to the ‘State Management’ screen where it shows the current ‘Currently Activated’ Students in the right hand panel and a search bar at the top in order to find students that are deactivated.
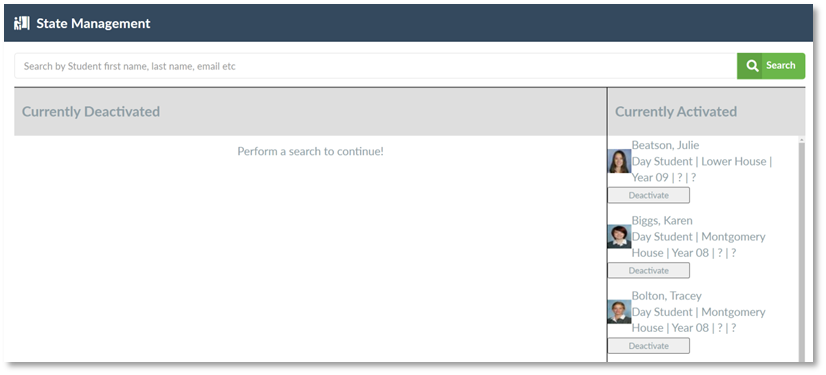
Manually Deactivating Students
In order to deactivate a student, the staff member just finds the relevant student in the ‘Currently Activated’ list and then clicks on ‘Deactivate’. Once deactivated they can be automatically activated by a timetable action or rota or can be manually activated by searching for the student in ‘State Management’ and then activating them as the screen below shows:
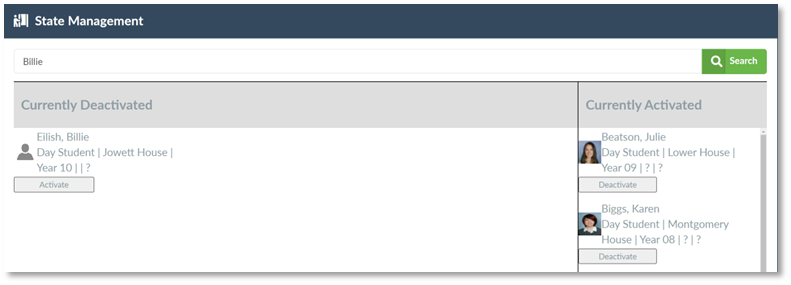
Manually Activating a Student
Search for the student you want to activate then click on ‘Activate’ when they appear in the ‘Currently Deactivated’ panel. They then will also appear in the ‘Currently Activated’ panel on the right.
Sign-out to Deactivate
A location can be set to automatically deactivate a student when they sign out to a location, for example where a ‘Day Student’ is leaving to go home for the evening they can sign out to location ‘Home’ that will automatically deactivate them.
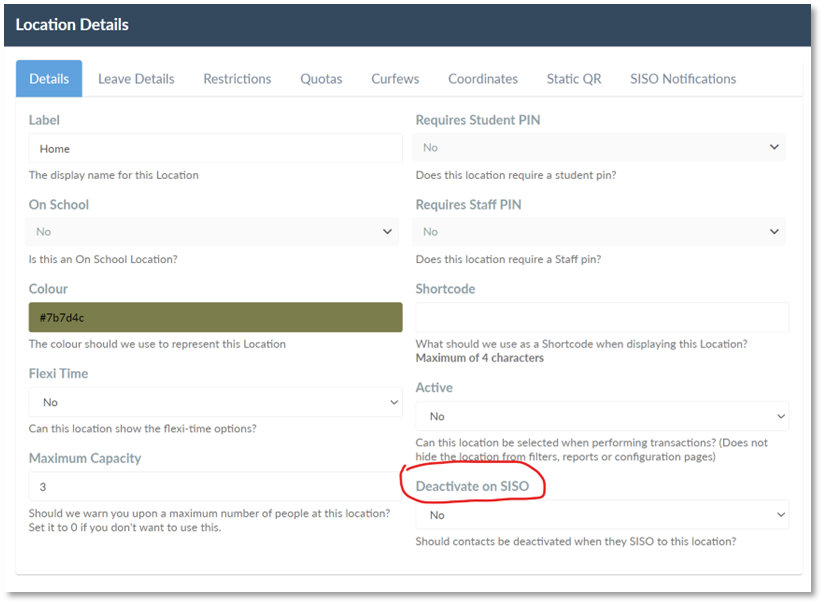
This automatic deactivation is set up in the system configuration for locations:
Main Menu > System Configuration > View System Configuration > Locations
Click on ‘View’ and then click from the list of locations provided to open the location that you want to set as the location that will automatically deactivate a student when they sign out to it.
Timetables (Rotas)
Rotas as set timetables that can be either Class (Academic or co-curricular) , Residential (boarding) or Fixtures (Sports or Activities) based and are created using the calendaring system and then students that are to be part of the timetable elements are assigned into them.
Once assigned into a timetabled rota, their state will automatically be managed by the rota unless manually changed by a member of staff using ‘Status Management’ or the student signing out to a location that is set to deactivate.
Note: Only Residential Rotas will currently subject students to control over their state, Class and Fixtures are for organisational purposes only and are part of future development.
Setting up a Rota (timetable)
The first step is to create the Rota Profile that you want to then add timetabled elements to, in this example we want to manage the status of ‘Day Boarders’ that come into school each morning at the start of school but stay after the end of the normal academic day for dinner, prep or after school activities before going home in the evening.
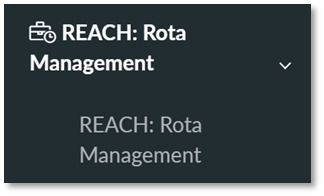
Rota Profiles are set up and configured using Rota Management:
Main Menu > Reach: Rota Management > Reach: Rota Management
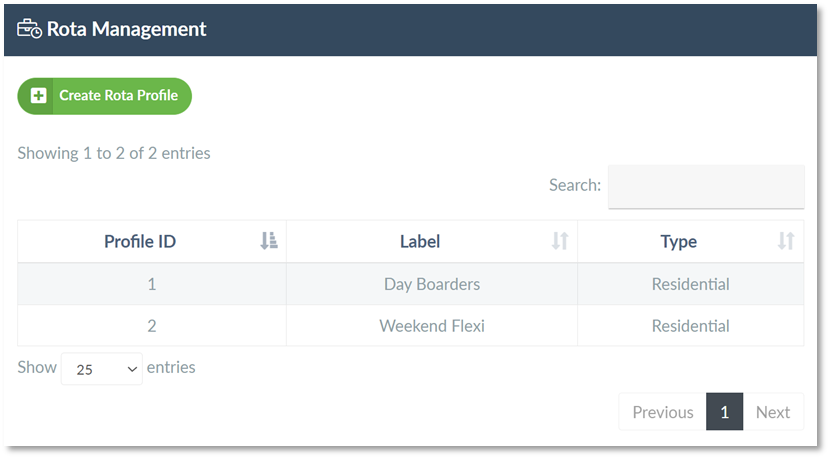
Clicking on ‘REACH: Rota Management’ will open up the Rota Management screen, click on ‘Create Rota Profile’ to create a new rota profile or click on any existing ones in the list to edit.
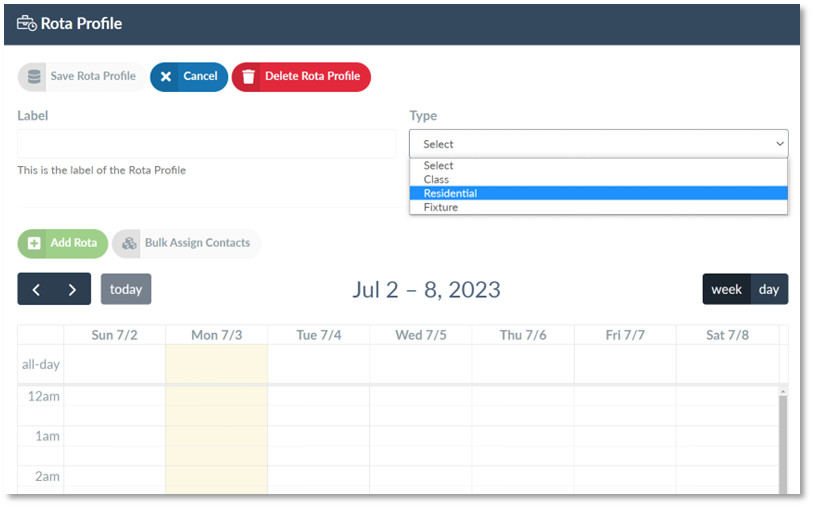
Give the new rota profile a label and select what type it will be from the dropdown list.
Click on ‘Save Rota Profile and the new rota profile should appear in the list under Rota Management (if it doesn’t just close the tab and go back into Rota Management from the Main Menu).
Next you need to create the timetable for the Rota Profile and add students into it, to start click on the Rota Profile you want to use, this will bring up the Rota Profile screen, click on ‘Add Rota’:
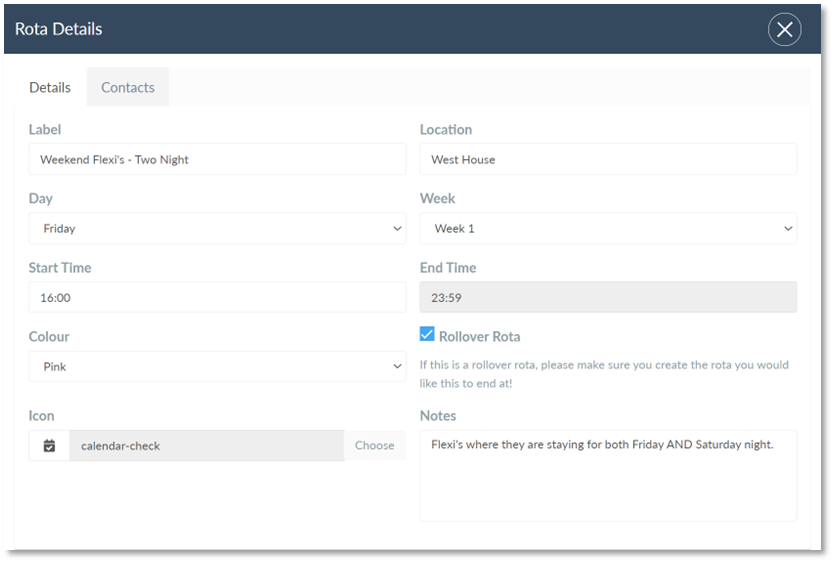
Give the new timetable item as label, a location if required and then set the day of the week and the time you want the students to become activated (Start Time) and the time you want them to be deactivated (End Time). You can then set a colour for the timetabled item and also give it an icon if required for identification.
Note: Rollover Rota If you want the timetabled item to cross more than one day, in this example the student should be activated at 4pm on the Friday and stay activated until Sunday evening so we have set the end time to 23:59 on Friday and selected the ‘Rollover Rota’ box, this tells Reach not to deactivate the student at 23:59 but to keep them in the current state into the next rota. You will need to ensure that there is a rota that follows at 00:00 the following day, in this case Saturday for this to work.
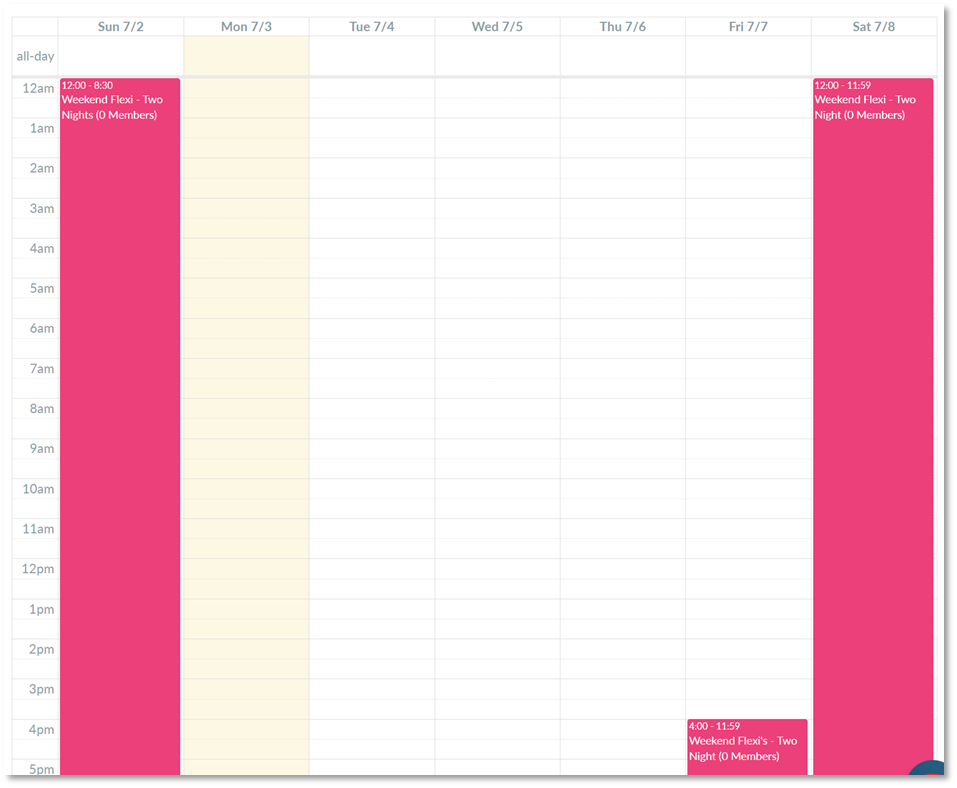
Once the rota items have been saved they will appear in the calendar, in this case we have ‘Weekend Flexi’s – Two Nights’ running from 4pm on Friday, when they will automatically be activated, through until 8:30pm on Sunday where they will automatically be deactivated unless they have already signed out to a location that deactivates them, or a member of staff deactivates them.
You can create and organise these timetabled rotas for different groups of students or based on the type such as residential or fixtures.
Assigning Students to a Rota (Timetable)
The final operation is to assign students to a rota so that their status is then automatically set according the start and finish times. To assign students to a rota go to the Rota Profile:
Main Menu > REACH: Rota Management > REACH: Rota Management
Select the Rota Profile you want to add students to and then click on the rota in the calendar view that you want to add students to, this will then bring up the Rota Details, click on the ‘Contacts’ tab and this will bring up the screen below:
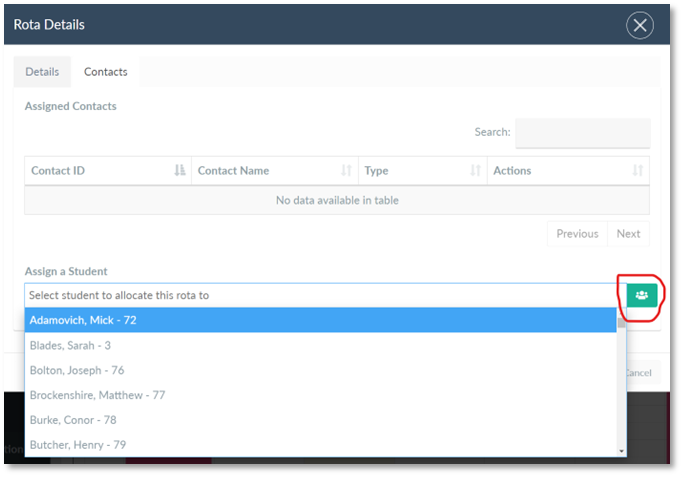
Under ‘Assign a Student’ you can either select the students on an individual basis or if you click on the bulk select icon Kiosk View (circled in red), this will bring up the contact selector screen:
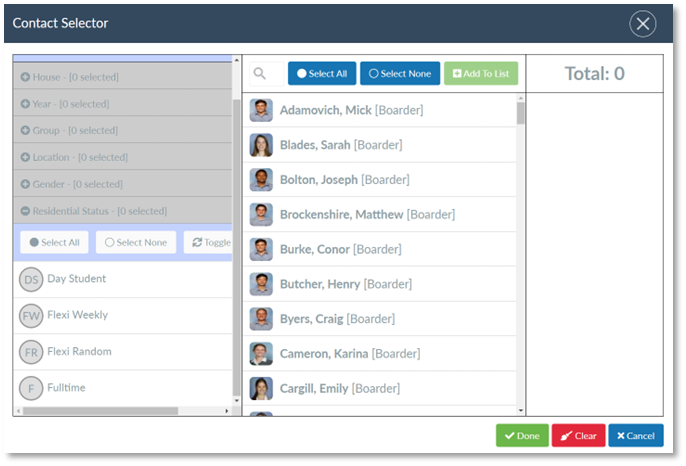
You can now bulk select students based on their house, year, group, location or Gender but also by their Residential Status, so in this case we want to add all ‘Day Students’ to the rota, we would then select the ‘Day Student’ residential status and add them in.