List Designer
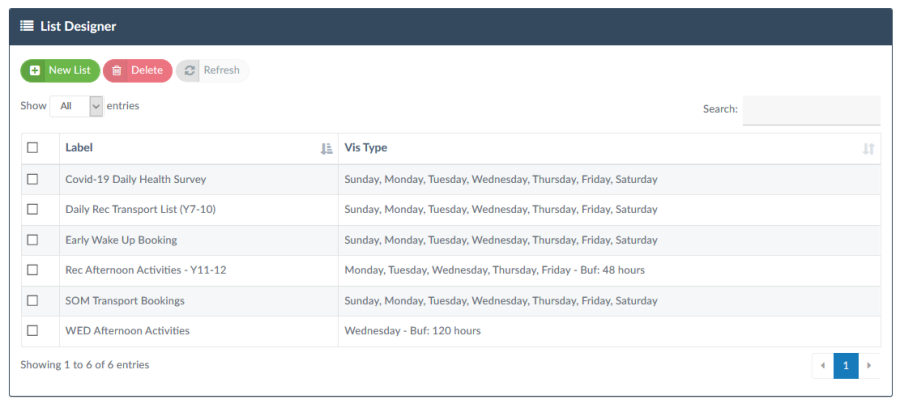
The List Designer is where you design and configure lists. The List Designer table provides a view of all of your current lists and their visibility setting. Here you can click to edit any existing lists or create new lists by selecting the New List button.

How do design a list
Lists are like any paper form only they are presented to the audience in a digital format. Your lists will be delivered to your audience via their REACH login either on web browser or through the mobile app.
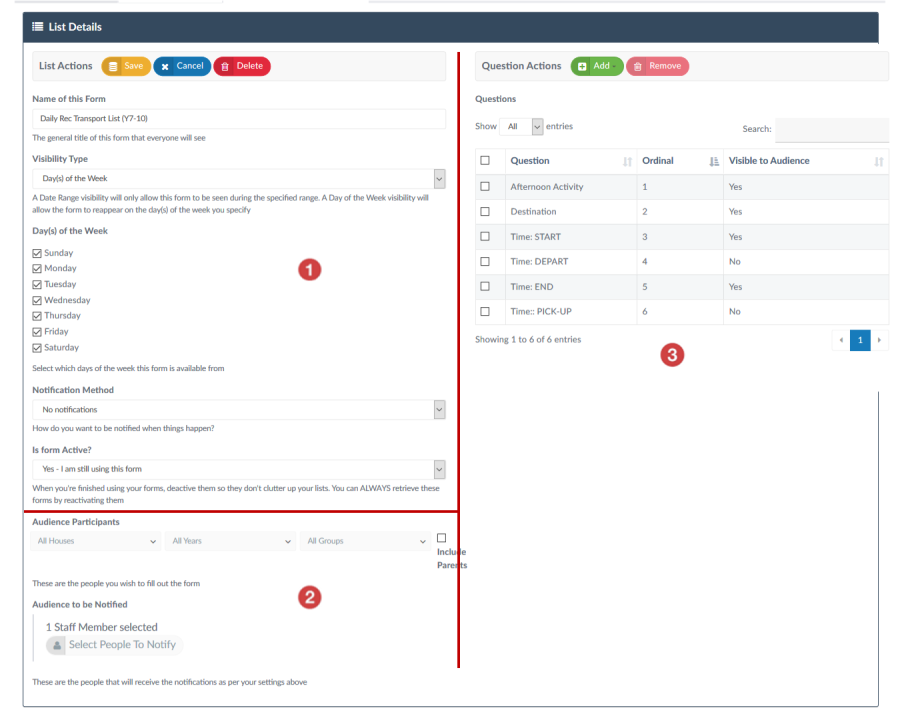
There are three (3) steps to designing your list;
Step 1 List Configuration
Step 2 Set your Audience
Step 3 Define your Questions

Configure your List rules
The configuration details set the basic rules for how your list will function.
Name of the List/Form
Call you list something that provides a clear reference for what the list or form is for.
Validity Type
"When" do you want to display your List or Form? There are three (3) types of validity or frequency that you can set.
- Date Range This will set a defined start date and end date for your list or form. This is the date range that the list or form will be visible to your participants.
- Days of the Week Allows you to decide which days of the week your list of form will be displayed. This is ideal for daily lists that are required to appear on the same day(s) each week. Your list or form will clear any collected data at the end of each day and begin the next day with blank data. You can select which day(s) the list will appear for your participants.
- Days of the Week with Buffer Allows you to set a more flexible visibility range on a daily or multi-day basis for your list or form. This is ideal for lists that you want to make available to participants for more than one day at a time on a weekly cycle (eg: list opens Mon and closes Wed each week).
Notification Method
Allows you to set how staff will be notified about data being submitted in your lists or forms. Options available are as follows;
- All Participants Completion Intended staff contacts will be notified only when all of the participants have submitted their data.
- Notify at Scheduled Date/Time Intended staff contacts will be notified at a scheduled Date and Time.
- Notify at Closure Date/Time Intended staff contacts will be notified when the list or form closes (ie: no longer visible to any participants).
Active or Inactive
Lists can be active or inactive. Only Active Lists will follow the Validity Type and Notification methods settings. Inactive lists are not visible to participants.
Determine the List Participants
There are two types of participants in your lists;
- Your audience - Students (or parents) who are invited to complete the list.
- Staff to be informed about the list
Setting your participants is simply a matter of using the filters and the people selector in order to identify who in your community you want to participate as your audience and staff supervisors for the list.
Students who are set to be participants for the list will have the list available to them when they log into REACH on the web portal or mobile app. Parents of students can also be added to the audience by selecting the Include Parents option.
Staff selected as the supervisors for the list will be notified about the list if there are any notifications set in the configuration of your list rules. You do not need to set any staff to be notified for the list to be operational.
Define the questions for your List
Questions are the content of your list, what your audience will see. You set the questions for your list in thew Questions Actions section of your List Designer.
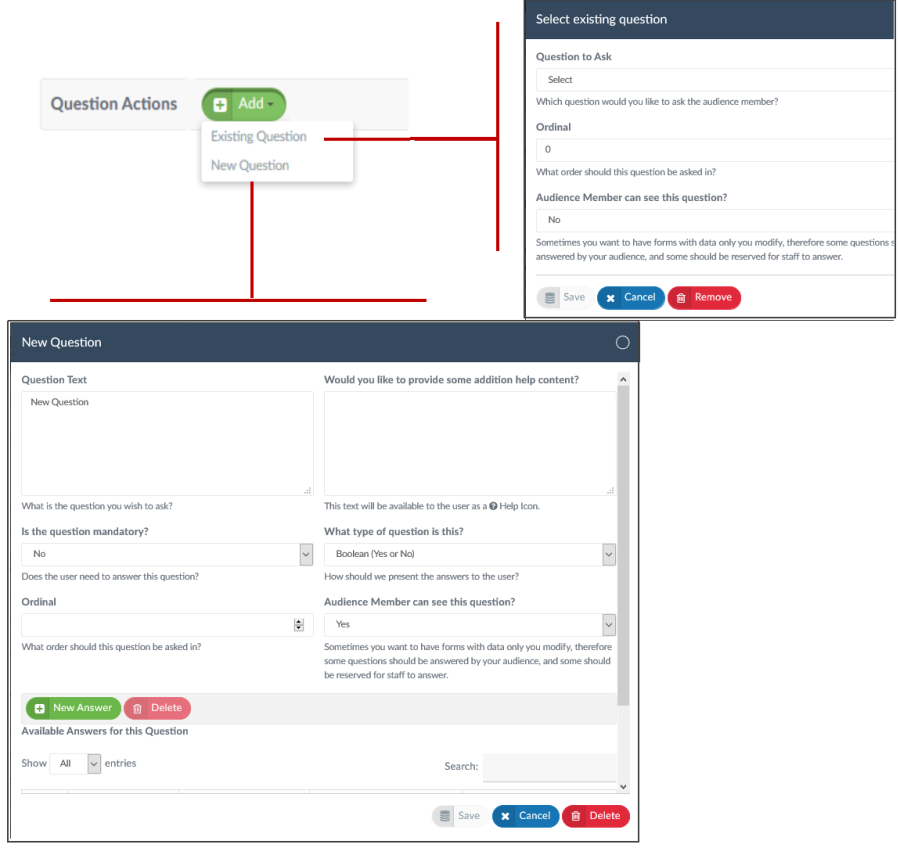
You can add questions from question templates that you may have already saved to your question bank or you can add new questions within Question Actions section by selecting the Add button.
!! Note that any questions added to your list as new questions (ie: not selected from the question bank) will be added to the question bank when you save the list.

Add Existing Question
Clicking on the Add Existing Question button will open the Select Existing Question modal where you are required to configure three (3) settings;
- Select which Question to add to your List Select your Question from the table of Questions that you have created in Question Management. Questions may only be used once in your List or Form.
- Set the Order for the Question You can arrange Questions on your list or form in whatever sequence you wish by using the Ordinal setting. Questions will display in alphabetical order if no ordinal setting is set.
- Set whether your participants can see the QuestionSet whether your participants can see the Question. Sometimes you may want to add Silent Questions to your list of form that provides supporting data for your output or provides fields that only your staff can see and complete when managing the list in List Management before downloading your output.
Adding New Questions
Adding new questions from the Question Actions section of your List Details screen will open the New Question form. The procedure and settings for this are identical to the Questions Details screen outlines in 33.2.3.1 of this guide.
Hidden Questions
Not all questions need to be seen by your audience.
Sometimes when you are producing a list you may want to include information in your output data that REACH already knows the answer to (eg: a student's year group) or perhaps some data fields that may require a staff member to up\[date once the information from your audience has been collected (eg: a Bus departure time may depend on the submitted times for your daily activities). In these instance you can set your questions to *not* be visible to the participants in your list (ie: they are visible only to staff members in the List Management view and in the export data). We call these Hidden Questions.
Published List
Once you have set your Questions and saved your List Details then REACH will publish the List to your participants according to the schedule that you set in the Validity Type settings of your List configuration. When a participant has added data and submitted their details then the results are published to your List Management Screen. Your List Management screen will collate all data from all participants for your staff to complete or download. \\