30.1.1 Creating Events
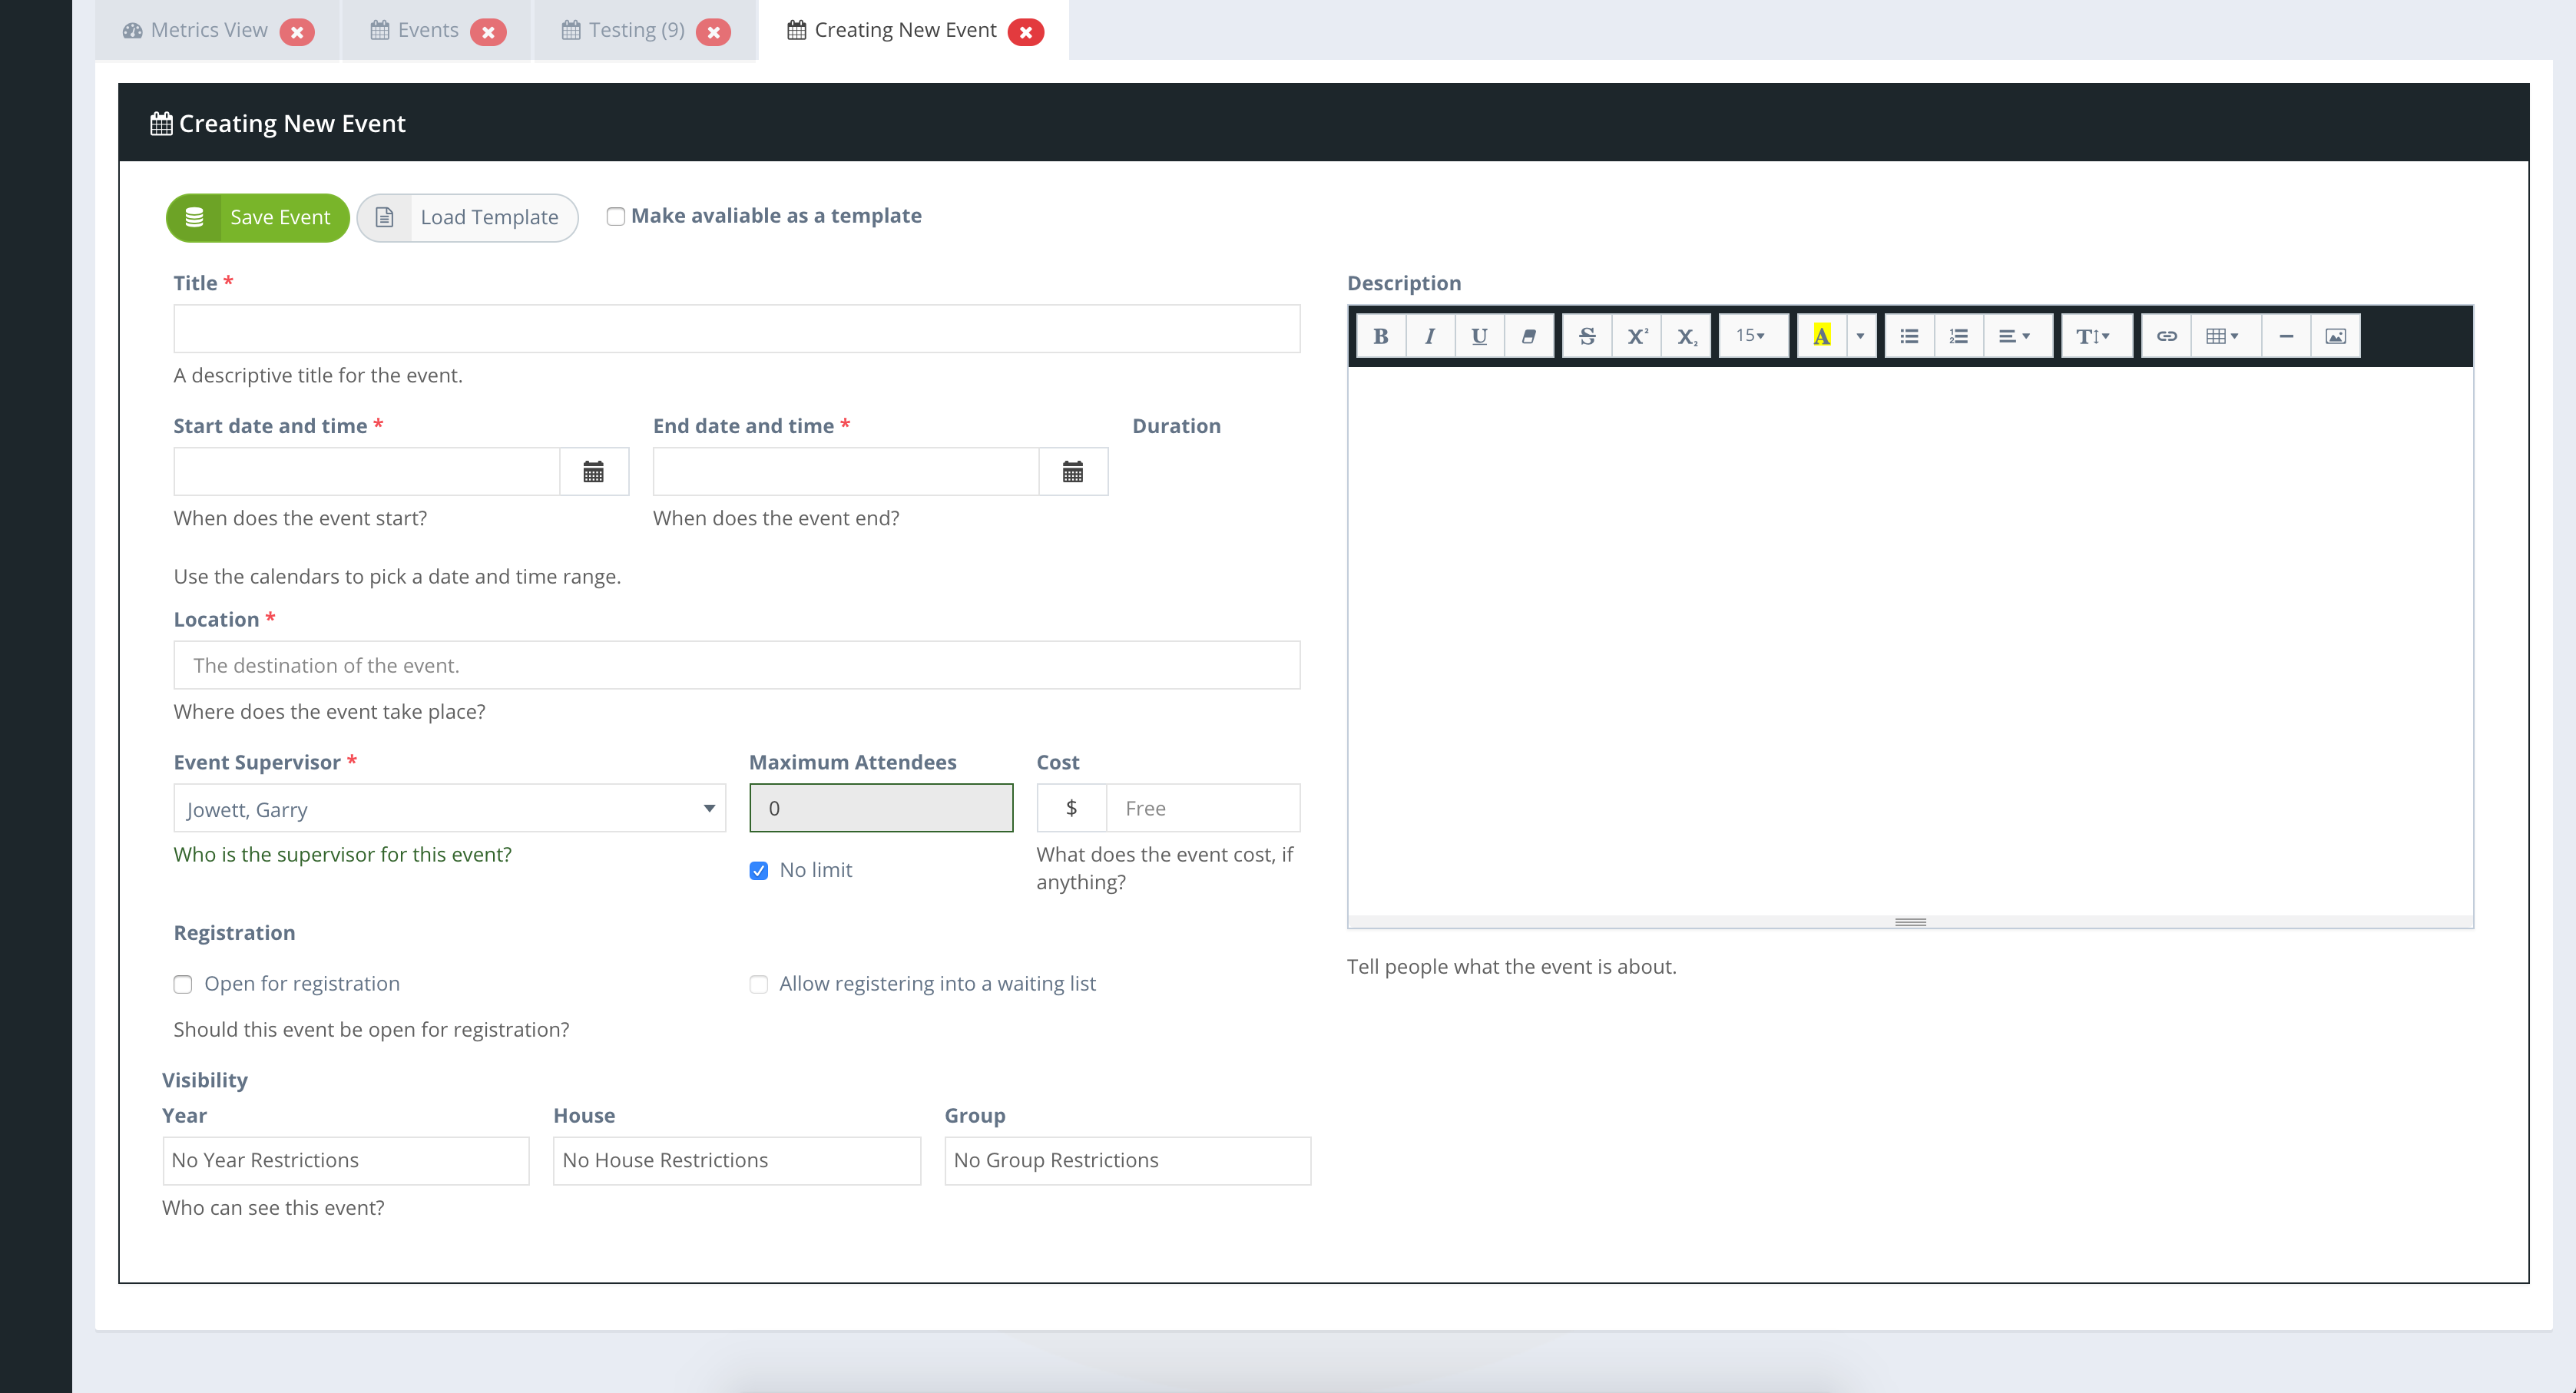
New events can be created by clicking on the New Event button in any of the event viewing screens. This will open the event creation form where you can enter the event details. When an event is created it will be visible for staff/faculty to access and manage.
Only Open events are visible for students and parents to register.
Events will only become visible and available for Students and Parents when the event status is set to Open.
The following fields are required to be set when creating a new event.
| Field Name | Description |
|---|---|
| Title | This is the name of the event as it will be displayed and promoted to your students and/or parents. The title is used as the main headed for the event in all of the main displays. |
| Description | This is a rich text editor that allows you to outline the relevant information that you want to share with the intended participants about the event. |
| Start Date | Begin time for the event. |
| End Date | End time for the event. |
| Location | Where the event is taking plae. |
| Event Supervisor | Identify the Supervisor or Manager for this event from a staff drop down list. |
| Maximum Attendees | Set the maximum number of attendees possible for the event or tick the No Limit option. When setting a limited number of attendees you will then also have an option to allow any overflow of registrations to go onto a waiting list. |
| Cost | Att eh cost of the event for participants to attend if there is a fee involved. |
| Open for Registration | When creating an event you can open it for registration immediately by tikcing the Open for Registration box. If this is left blank then opening the event for registration is done manually or from the events scheduler which can be set to automatically open the event for registration at a designated time. |
| Visibility Filter | The visibility filter is also an invitation filter. Here you can use the filters to determine who can see the event for registration. This will set your invitation list for emailed invitations. |
Use Templates for events that occur regularly.
You can save events that you have created as Event Templates so they can be reused for future events that you need to create.
Setting Maximum Attendees
When creating events you can determine if the event has a maximum number of attendees possible. If there is a limited number of places available for an event then you can set this number and determine of any overflow of registrations will be placed on a waiting list.
Setting Event Visibility
By default, events are available to your entire student population however you can use the Visibility Filters to limit the set of students that will receive invitations to the event. This will also limit whether students can see the event for rgistration via their kiosk screen or personal login to REACH.
Open for Registration
When creating an event you can open it immediately for registration. This will make the event visible immediately to the audience selected by your visibility settings.